Learn how to manually enter and submit your weekly timesheet. Before clocking out or submitting your timesheet, make sure you have completed any tasks that may have been assigned to you or the shift.
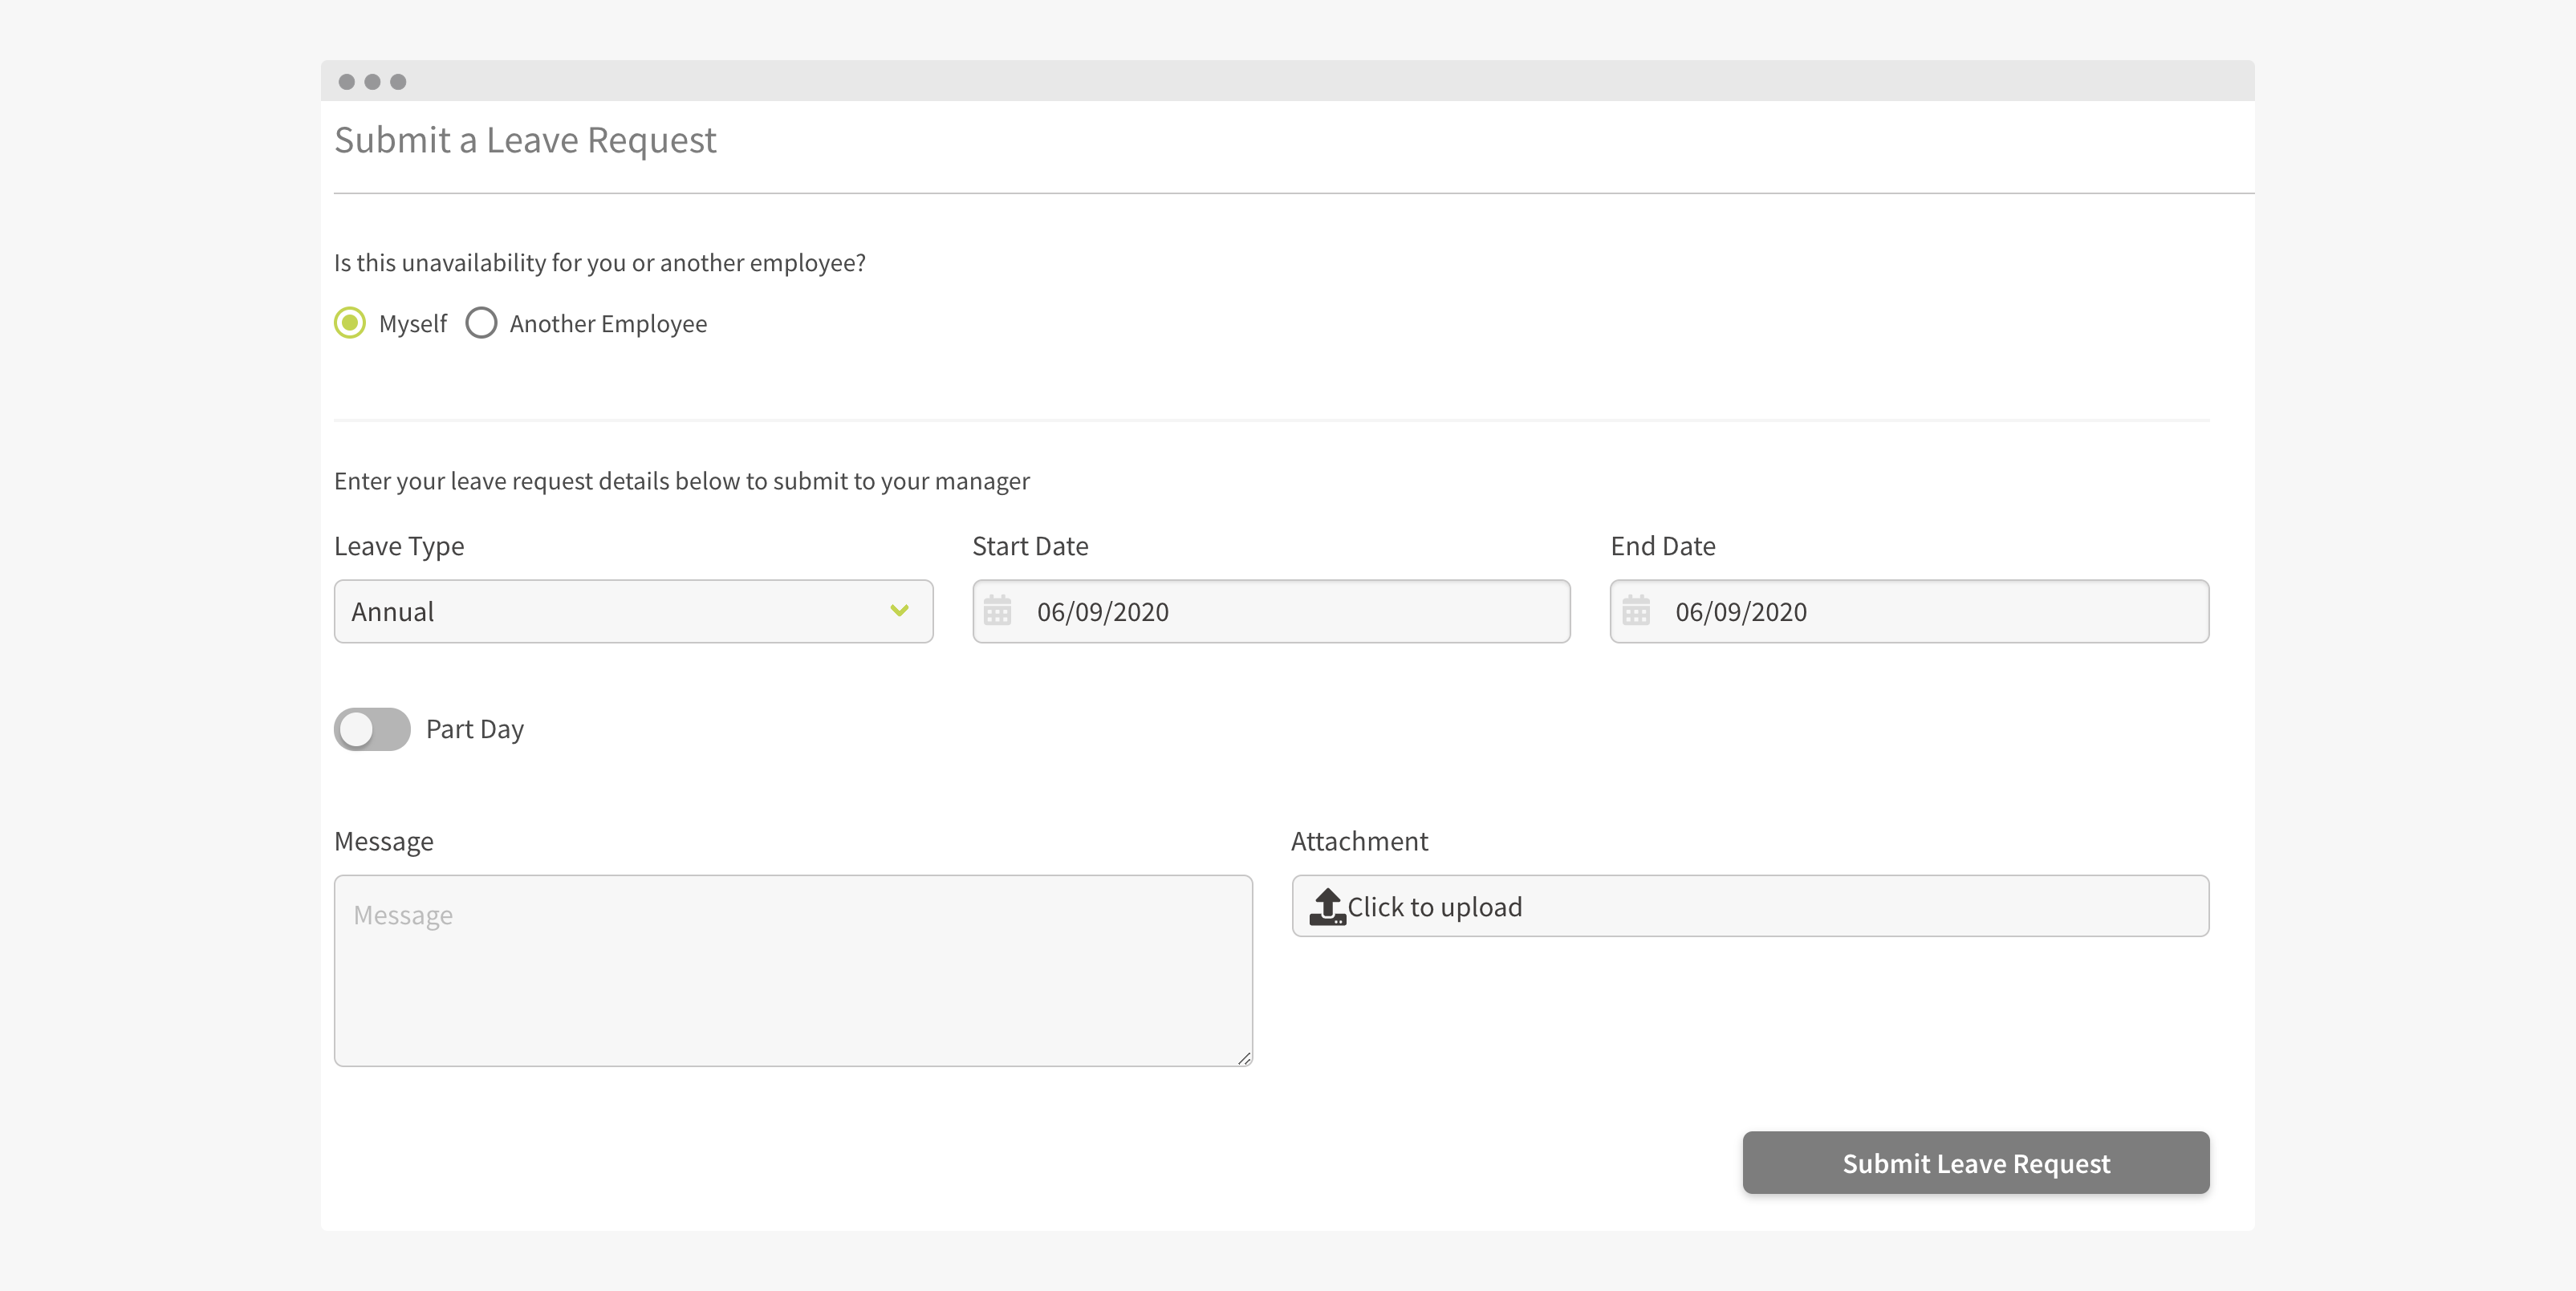
Apply for Leave
Once your employees are set up correctly, they can apply for leave, or managers can apply for leave on their behalf. To submit a Leave Request, go to Time & Attendance and click Apply for Leave.
Select whether you are applying for leave for yourself or on behalf of an employee. *Note: This option only appears for Administrators or Managers.
Enter Leave type (e.g. annual leave)
Specify the dates the leave will start and end.
Specify whether this is a full day or partial day. If only a partial day, include the times of the leave.
Make sure to include a message. This is a required field, so ensure you’ve included a message.
Add a document or attachment if required (e.g. doctor’s note).
Once all details are populated, click Submit Leave Request. This will then send a message to your manager for approval.
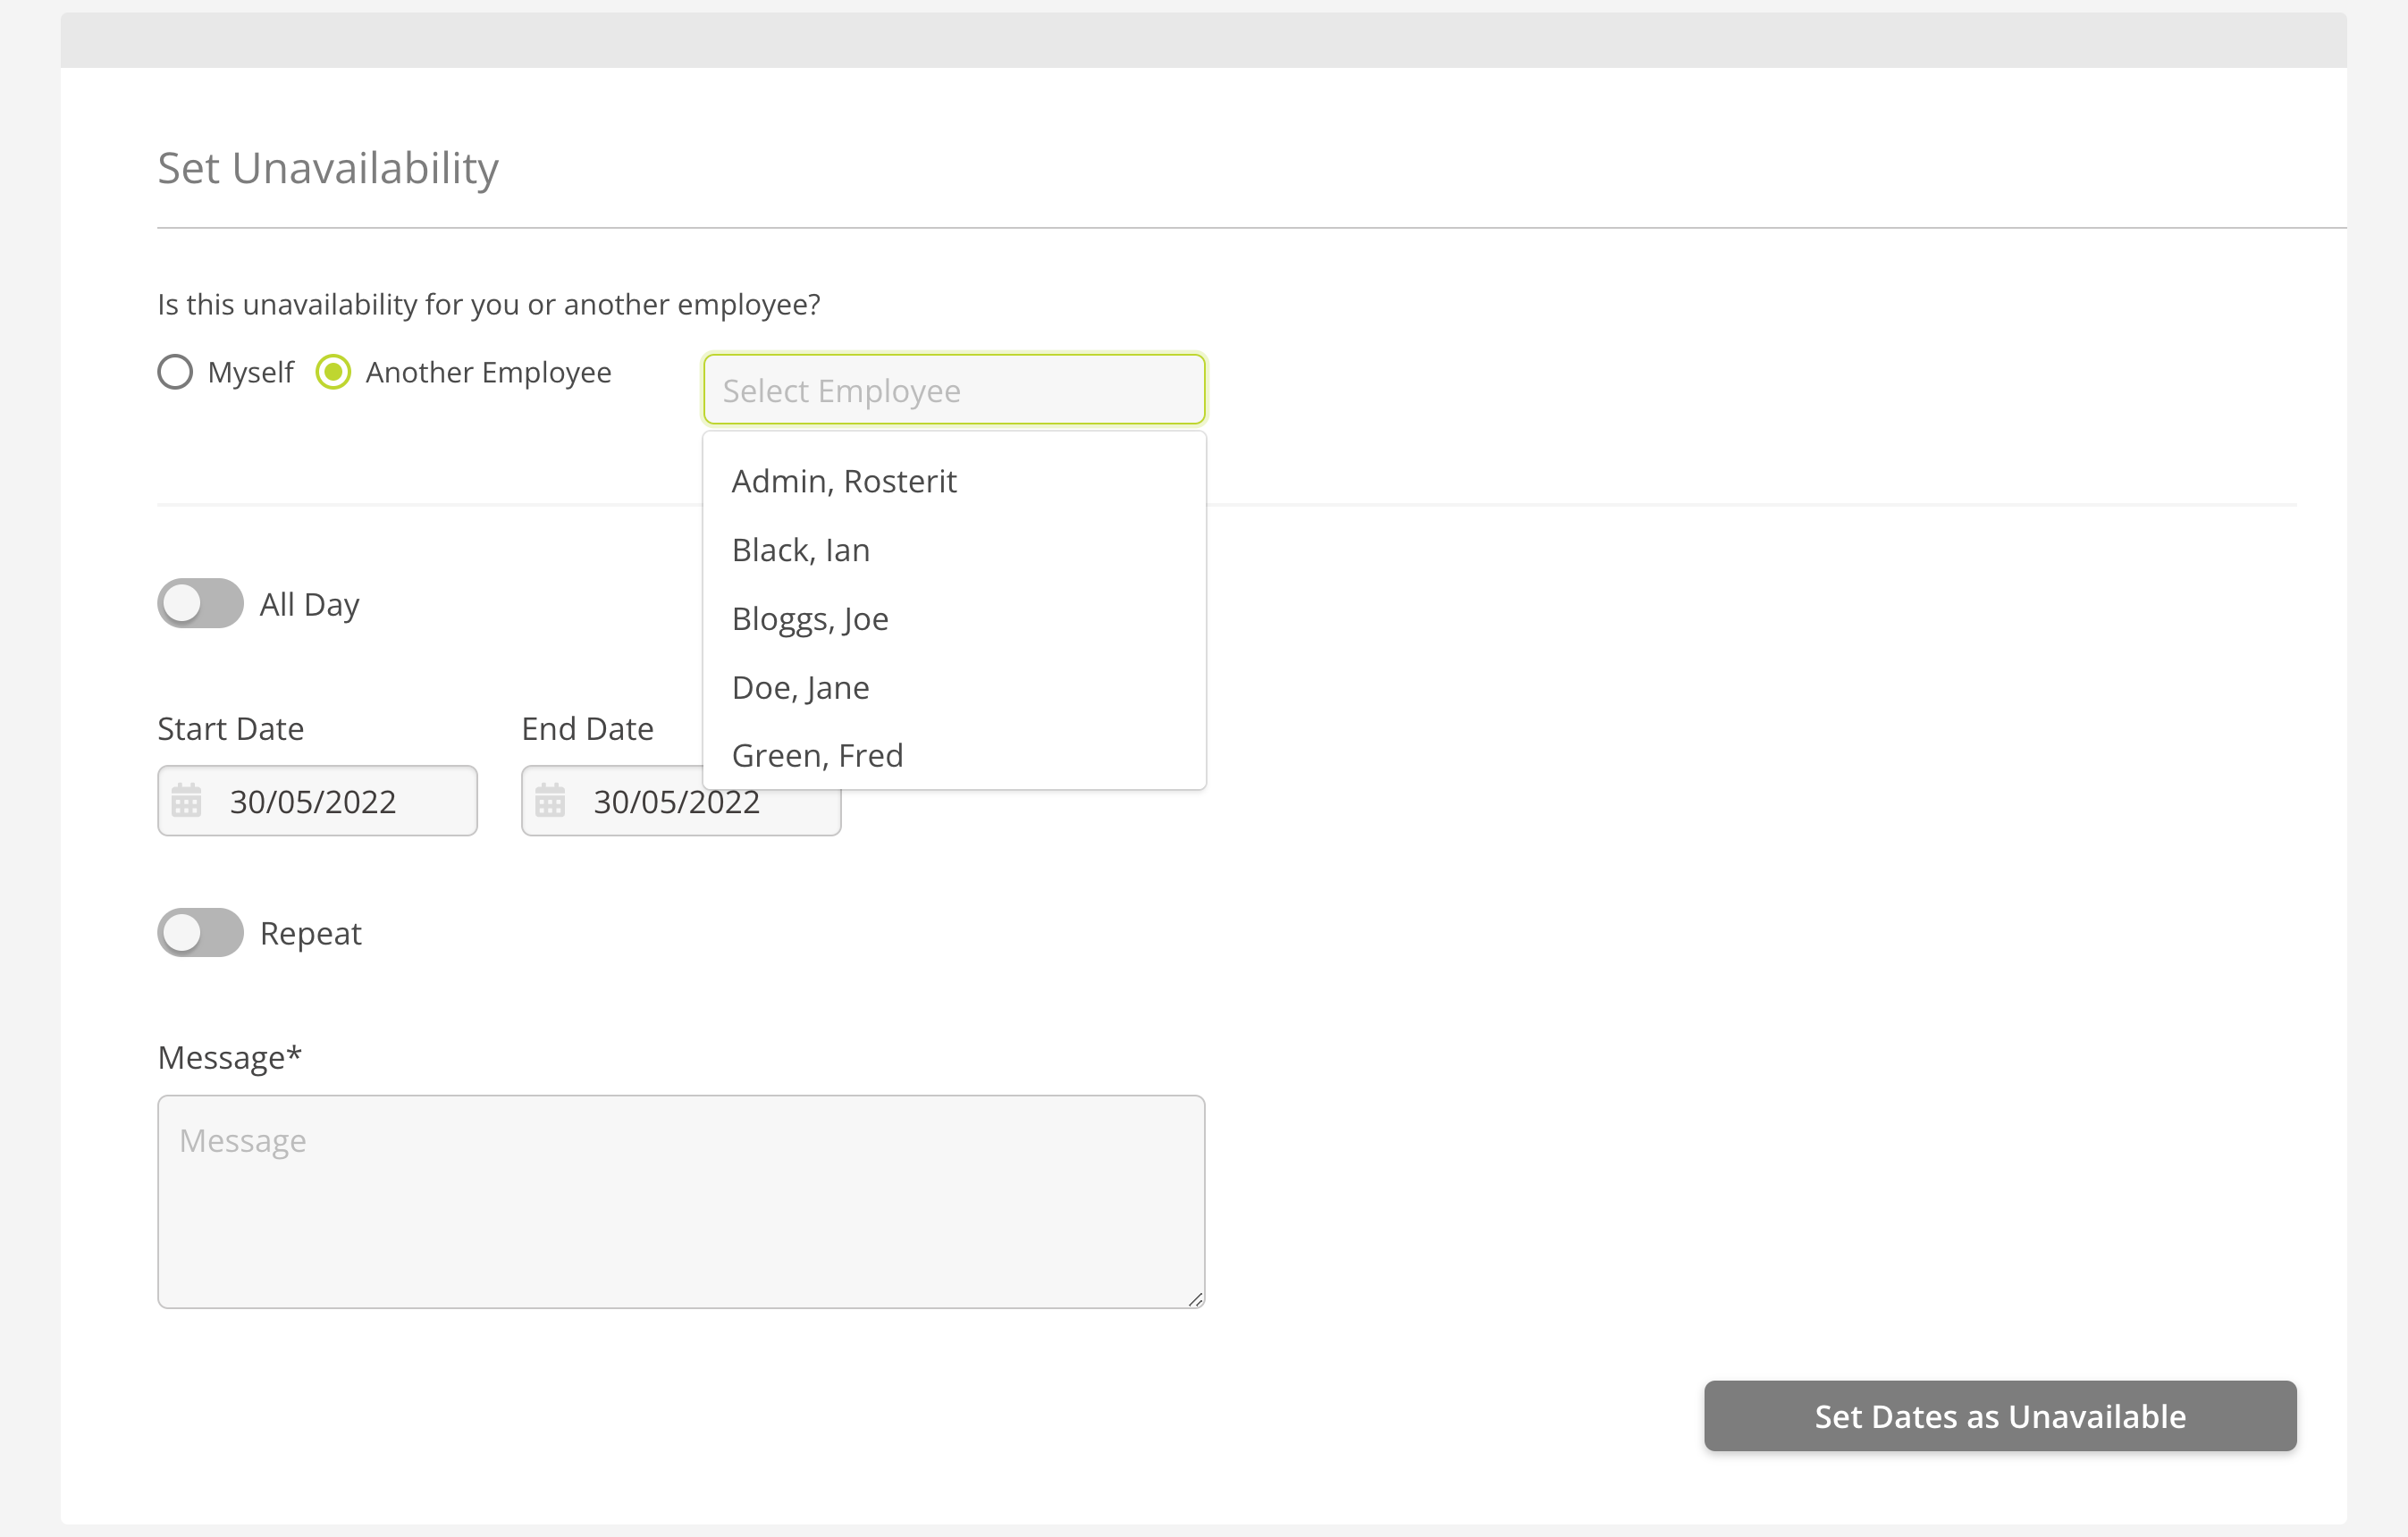
Submit Unavailability
The difference between unavailability and leave is that unavailability is not reflected in the employee’s Timesheet. To request unavailability, go to the Time & Attendance page and click Submit Unavailability.
Specify whether you are submitting unavailability for yourself or on behalf of another employee.
Specify whether this is a full day or partial day. If only a partial day, include the times you will be unavailable.
Specify the dates the unavailability will start and end.
Specify whether the unavailability repeats (e.g. every Monday).
Make sure to include a message. This field is required in order to submit the unavailability.
Once all details are populated, click Set Dates as Unavailable. This will then send a message to your manager for approval.
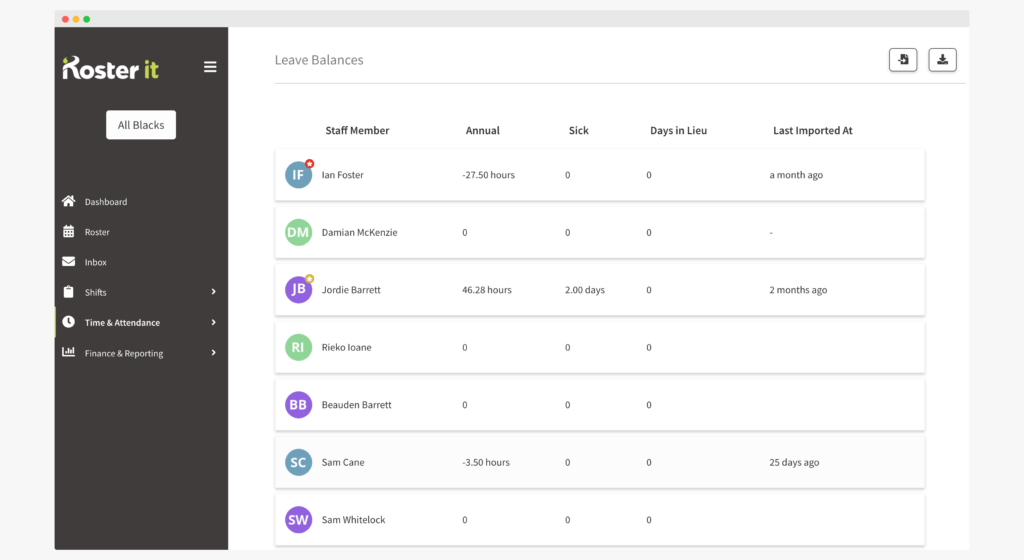
Review Your Leave Balances
To view your leave balances, go to Time & Attendance and click View Leave Balances.
Download your Leave Balances from your payroll provider.
Import your Leave Balances into Rosterit after each pay cycle to ensure these are up to date.
Still need help?
If you have any technical support queries or need help resolving an error, please visit our Frequently Asked Questions (FAQs) or submit a ticket for our technical support staff.