The next step will be to add all relevant company locations and departments that will be using Rosterit. This may include branches, event venues, or work sites. This helps to group employees for reporting purposes and allows your team to view only certain locations or departments on your roster.
For workplaces with multiple job sites or office locations, you also have the ability to filter employees by Location or Department. Add locations or departments by going to Settings and selecting Locations & Departments.
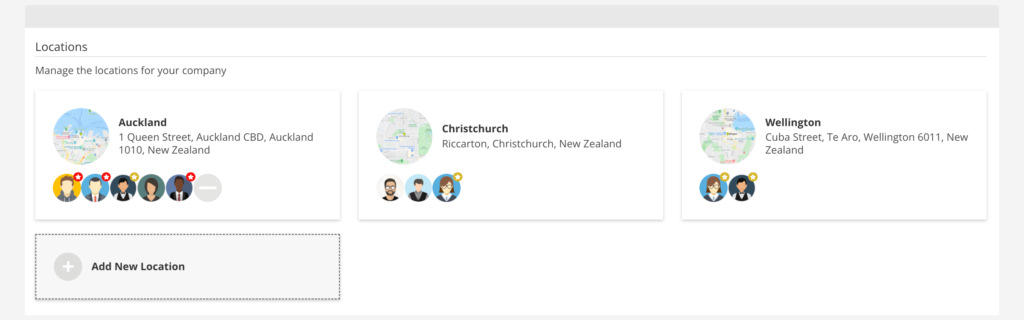
Add Locations
All employees must be assigned to at least one Location to be eligible for shifts (can have more than one). Locations are also used for Clock in & Clock out functionality based on the shift.
To add a location, simply click on Add New Location from the Locations & Departments page.
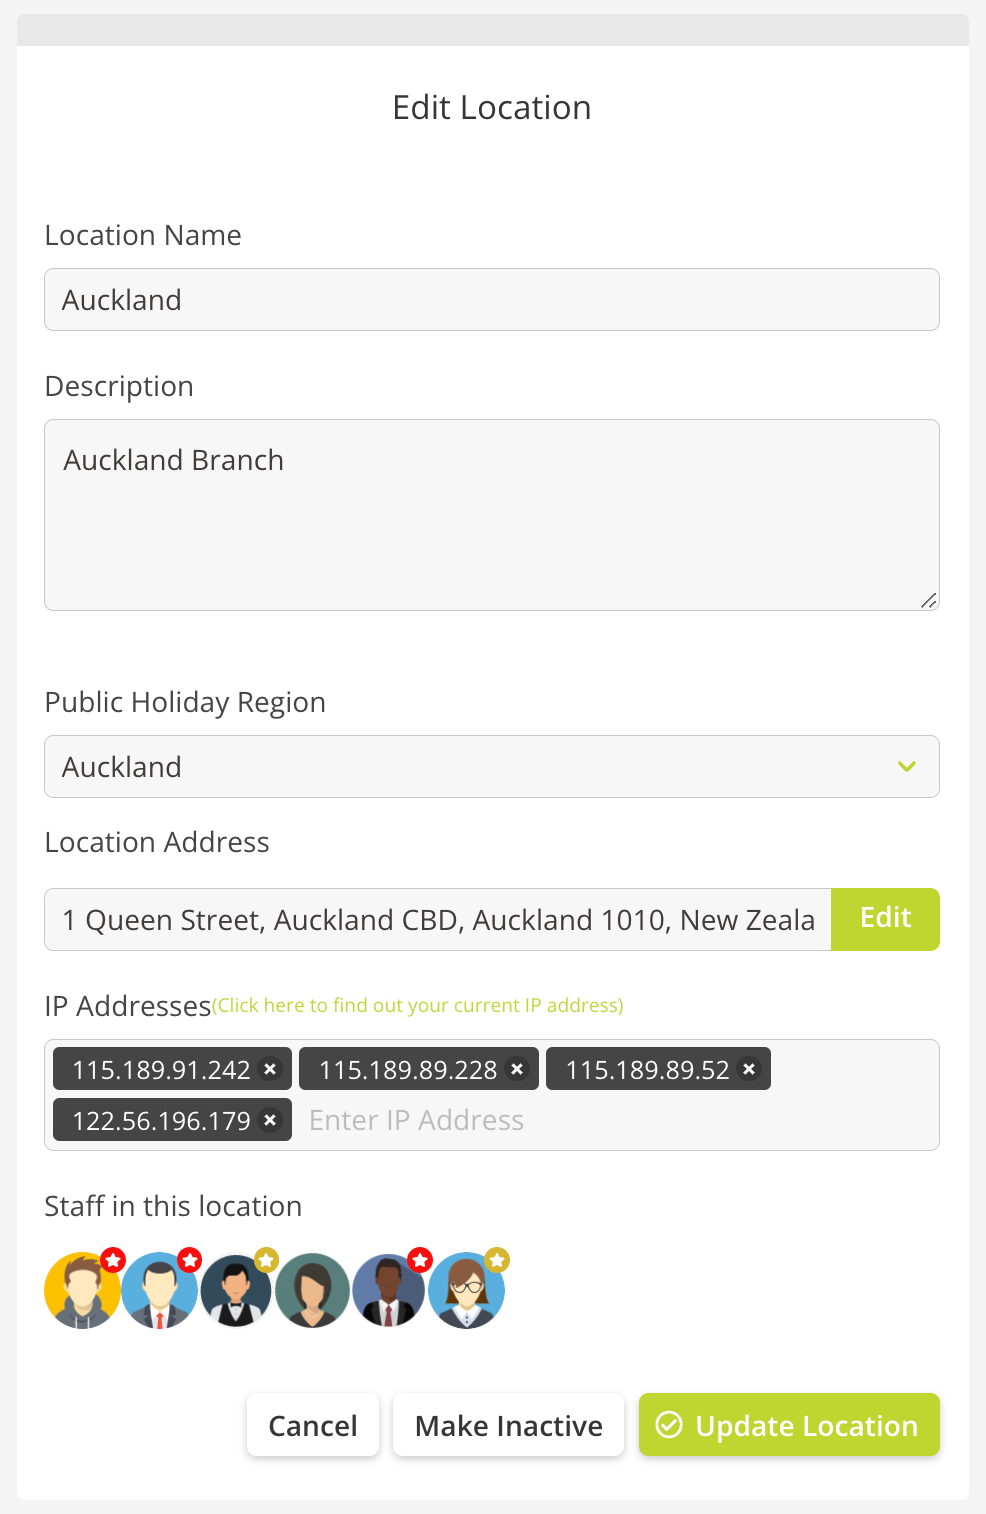
From there, a pop-up window will appear, where you will fill in the following details:
Click onAdd New Location
Enter a name for the location. (*Note: This is the name used for importing employees.)
Enter a description (if applicable)
Enter the public holiday region (*Note: Only applicable for Time & attendance module.)
Add the Location Address. This is used to source the GPS location for GPS time clock functionality.
Add an IP address if the IP address function has been turned on under the Time & Attendance Settings in your Company Settings. This is required for Facial Recognition, and helps when location services are not available for the GPS Time Clock. To find your network IP address, simply click on the Click here button to find your current IP address.From
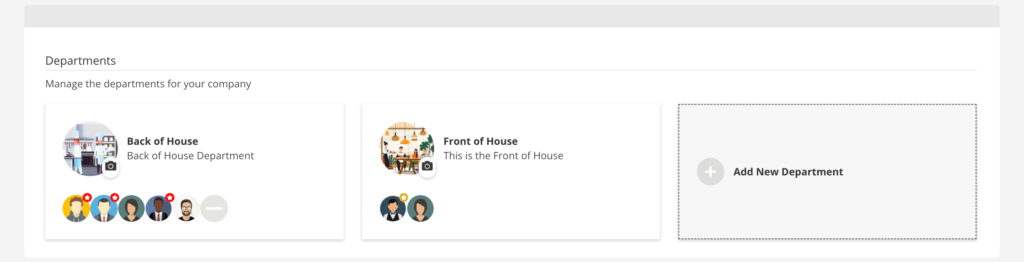
Add Departments
All employee must be assigned to at least one department to be eligible for shifts (can have more than one).
To add a department, simply click on Add New Department from the Locations & Departments page.
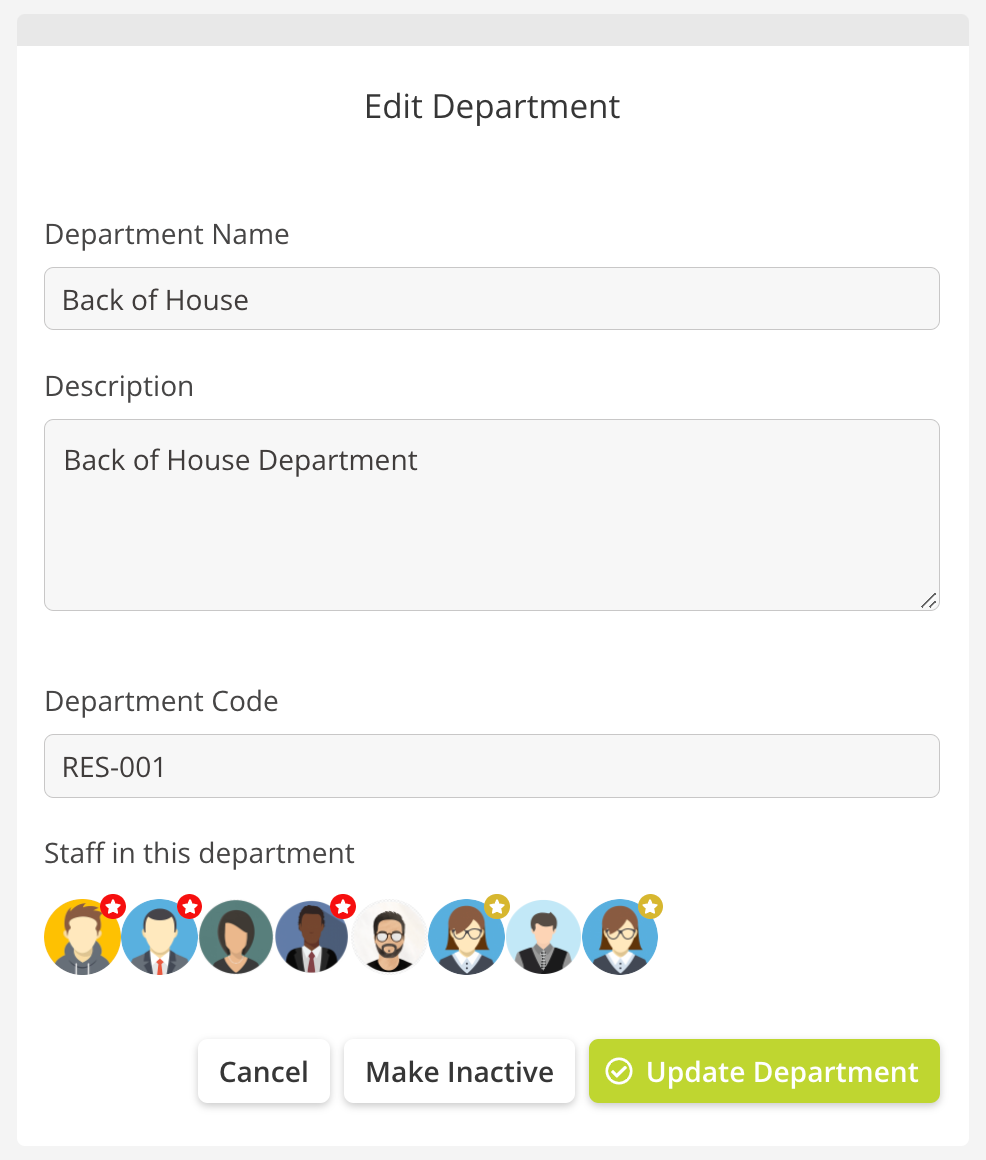
From there, a pop-up window will appear, where you will fill in the following details:
Enter a name for the Department. (*Note: This is the name you will used on the Employee Import template if importing employees in bulk)
Enter a description (if applicable)
Add the department cost code (if applicable). If using the Department Payroll Cost Code from your Company Settings, this should match your cost code from your payroll software.
Next Step: Add Jobs & Tasks
Learn how to create and assign specific jobs and tasks to monitor employee costs and productivity.
If you have any technical support queries or need help resolving an error, please visit our Frequently Asked Questions (FAQs) or submit a ticket for our technical support staff.