Basic Set-up & Payroll Integration

Basic Set-up: Time & Attendance

The first step when getting started with Rosterit’s Smart Attendance features is to configure your Time & Attendance settings. If you have not yet done this, navigate to the Time & Attendance section of the Customise Your Settings training document.

clock with checkmark icon

Specify the Timesheet Source

Rosterit gives you the option to populate timesheets in more ways than one – through Manual Timesheet Entry, GPS Time Clock, Rostered Timesheet, and GPS (via the Roster). Let’s go into what each of these timesheet types mean:

Manual timesheets are used for your employees to enter and submit their times manually for shifts that they work during a period. This option pulls through what they were rostered onto and allows them to adjust times if they worked shorter or longer than planned. This option also allows allowances to be added. 

The Manual Timesheets feature will only appear for an employee if the Timesheet Source is set to Manual in the employee’s settings.

Once you have entered your timesheet details from the Manual Timesheet page, click Save and Submit. The time entries will now flow though to their manager for approval via the View Timesheet page. 

Roster times are automatically brought through each night and added to the timesheet. The Rostered Timesheets feature will only appear for an employee if the Timesheet Source is set to Roster in the employee’s settings.

This option allows the timesheet to be populated from the roster, but also monitors your employee’s clock in and clock out times, which can be viewed on the timesheet page. This option is similar to the GPS Time Clock, however the only difference is that the timesheet is populated from the Roster, not the GPS Time Clock.

Find out how to use Rosterit’s GPS Time Clock here.

Find out how to use Rosterit’s Biometric Facial Recognition Time Clock here.

clock with checkmark icon

Payroll Integration

Follow the below set-up checklist to ensure you have properly configured the below required settings:

Rosterit integrates with the leading payroll providers, including IMS Payroll, Smart Payroll, iPayroll, MYOB, ACE Payroll, and Crystal Payroll. Through simple data import and export, Rosterit can feed information back and forth from your existing payroll provider. 

Set up all relevant payroll information by going to Company Settings and selecting the Time & Attendance tab. From here, you will select your preferred Payroll provider from the dropdown list, as well as the payroll cost codes or special leave codes for that provider if different from the default codes.

Once this is configured in your Company Settings, you will be able to export Timesheets from Rosterit by clicking on the Export to CSV button from the Timesheets page, which can then be uploaded directly into your preferred payroll provider with no need to reformat the file. 

Is your payroll provider not listed? Get in touch with us.

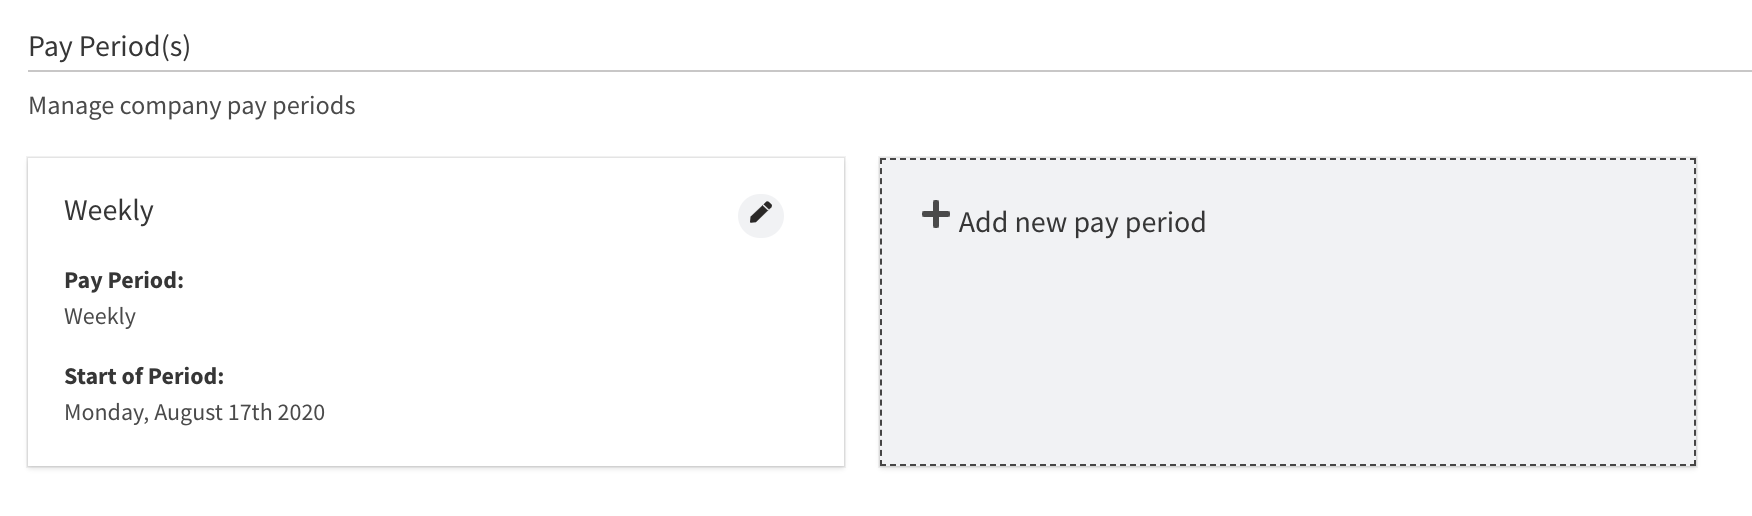
Create at least one Pay Period (e.g. weekly, fortnightly, etc.) by going to Company Settings, selecting the Time & Attendance tab, and going to Pay Periods.

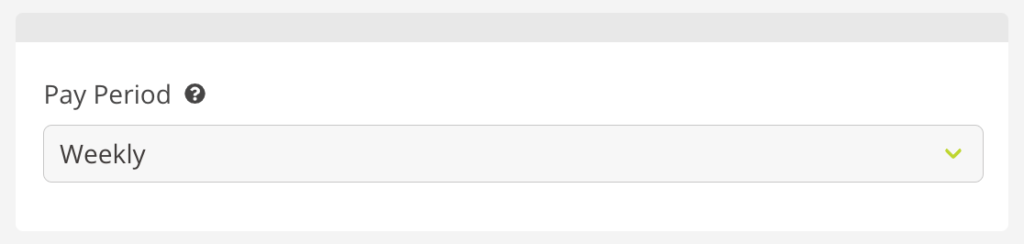
Make sure each employee is assigned to a specific pay period by going to the Employees page, selecting the Pay & Rewards tab, and selecting a Pay Period from the dropdown menu.

If they are not assigned to a Pay Period, they will not appear on the View Timesheets page and therefore their times cannot be exported to your payroll provider. 

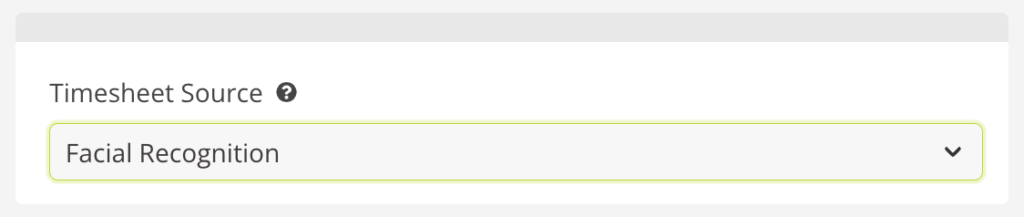
Assign a Timesheet Source for each employee by going to the Employees page, clicking into an individual employee, selecting the Pay & Rewards tab, and choosing a Timesheet Source from the dropdown menu.

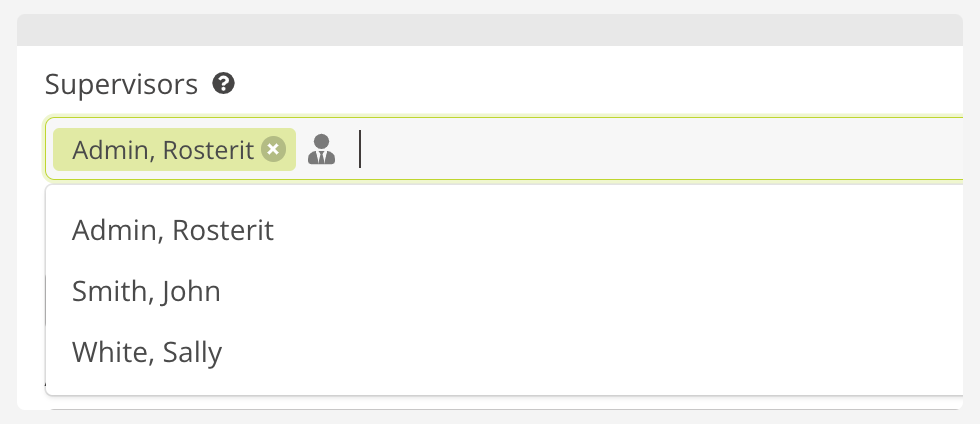
Assign a Supervisor for each employee by going to the Employees page, clicking into an individual employee, selecting the Details tab, and choosing a Supervisor from the dropdown menu.

In order for employees to be able to clock in and out of shifts or record their timesheet entries, shifts need to be created and assigned to an employee.

Still need help?

If you have any technical support queries or need help resolving an error, please visit our Frequently Asked Questions (FAQs) or submit a ticket for our technical support staff.

Submit a Support TicketClick Now

Powered by BetterDocs

Close Bitnami banner
Bitnami